A popular question that we get regularly is; How do I cut a ceramic tile without breaking it? If you’ve never done it before it can seem like a tricky job, however the trick to cutting a tile successfully is simply scoring through the glazed coating.
As with most, if not all building work, the money spent on decent equipment will save you a fortune in wasted materials, time and things you have broken in temper. Read on to find out how to cut tiles and what different tools can be used.
Types of Tile Cutters
There are numerous different tools that can be used to cut ceramic tiles and these include the hand held tile scribe, the manual or contractors tile cutter, the electric tile cutter, tile saw and also hand-held tile nips.
Each different tool has its own specific usage case and situation where it may be slightly more preferable than any of the others cutting options.
- Tile Scribe: The cheapest and easiest of all tile cutters and can be purchased for only a few pounds. The tip features a tungsten carbide cutting point then when pulled across the surface of a tile, scores through the glaze allowing you to then easily snap it to size. Only really good for tiles up to 8mm in thickness
- Manual Tile Cutter: The manual tile cutter is a little bit more involved and can handle tiles up to 10mm in thickness. Simply place the tile on the flat bed and line the tungsten carbide cutting wheel up with the line and then use the handle to drag the wheel over the line, scoring through the glaze
- Electric Tile Cutter: The electric tile cutter is a step up yet again. Featuring an electric motor that powers a special circular tile cutting saw blade, once marked, the tile is gently pushed into the cutting wheel where it then creates a clean and accurate cut. Most also feature a water reservoir that keeps the blade wet, ensuring the cut is as clean and smooth as possible
- Tile Saw: Although not ideal for cutting straight lines as the blade tends to waver slightly, the tile saw is ideal for cutting shapes and curves, giving you a nice accurate and clean cut
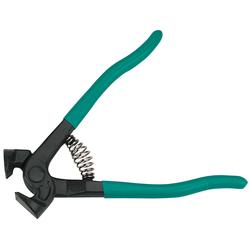
- Tile Nips: Although not strictly used for cutting tiles, tile nips are ideal cutting shapes, curves and odd angles where accuracy in your cutting is of prime importance. Simply use them to “nip” away as small chunks of the tile until you get the shape you desire and then tidy it up using a file for or carborundum stone
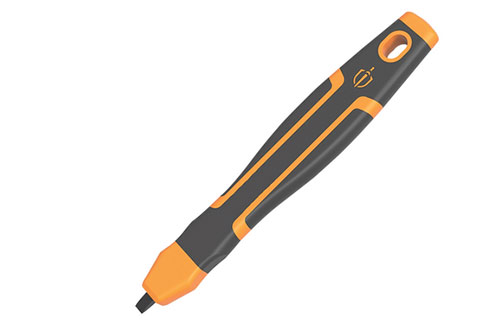
Basic tile scribe for cutting ceramic tiles
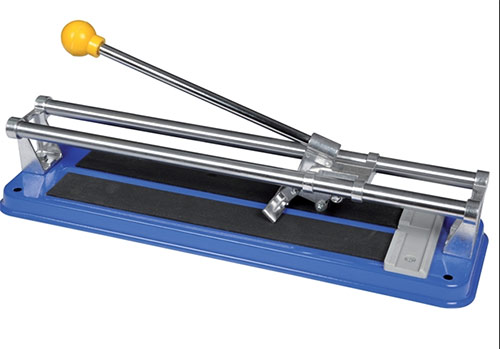
Manual or contractors tile cutter
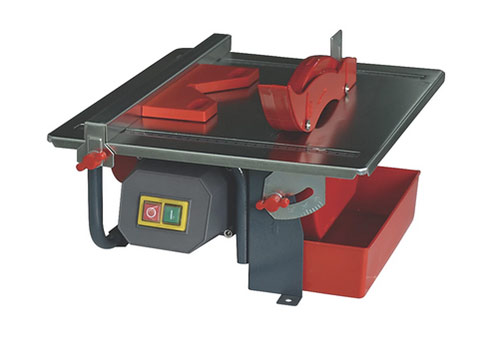
Electric tile cutter
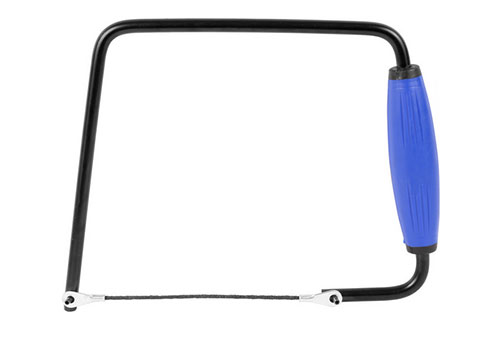
Tile saw for cutting shapes and curves in ceramic tiles
Tile nips for cutting shapes in ceramic tiles
What’s Best Way to Cut Tiles?
The best tool to use for cutting ceramic tiles really depends on the type of tile you’re cutting and the type of cut you’re making.
For example, if you are tiling a kitchen or bathroom wall, the most common cut you’re going to need to make is a straight line cut when cutting a tile to fit a specific gap. For this the best tools to use would be the tile scribe, manual tile cutter or electric tile cutter as each will give you a nice straight cut.
However if you need to cut a tile to a specific shape to fit around an object then the best tool to use would be a tile saw, tile nips or even a circular tile cutting drill bit if you need to form a perfect circle.
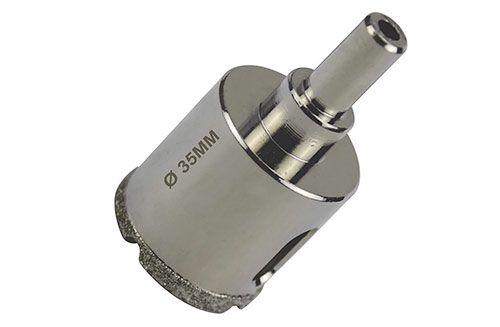
Diamond-tipped tile cutting drill bit
However if you need to cut specialist tiles such as quarry tiles or porcelain tiles, as they are very hard and brittle you need to use a wet tile cutter equipped with a diamond-tipped blade.
Staying Safe When Cutting Tiles?
Cutting tiles can be a fairly dangerous job as the act of cutting them can create large amounts of small, very sharp shards of tile and glaze. If you’re not wearing gloves or goggles, these shards can easily stick in your hands and cause cuts etc.
Likewise, when using electric or powered tile cutters, as the blade is rotating very fast, this can throw tiny shards of tile all over the place so goggles are also essential no matter how you’re cutting your tiles.
How to Cut Tiles Using a Tile Scribe
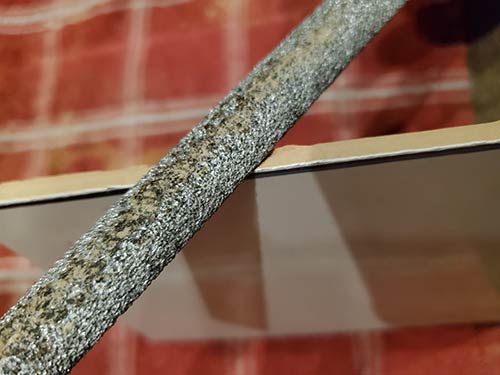
The first method for cutting straight lines in tiles is the hand cutter or tile scribe. Tipped with a tungsten carbide blade, this tool will score the glaze on any tile and then allow you to simply break it off.
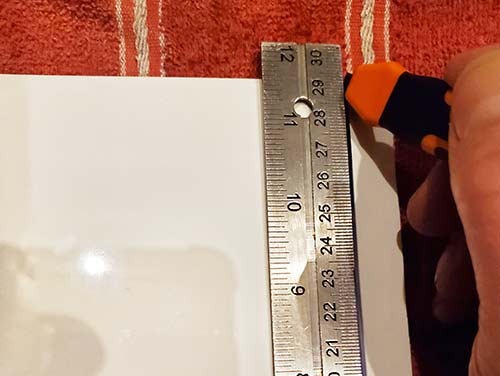
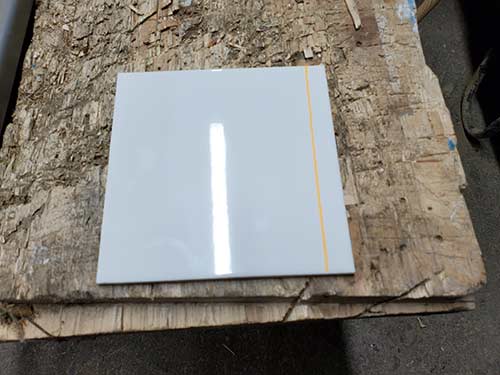
- Step 1 – Measure and Mark: First, measure the exact size you want to cut your tile to and then use suitable pen (Sharpie) to mark a cutting line
- Step 2 – Place Straight Edge: Using a straight edge of some kind, metal ruler, spirit level or another tile, place it on the exact point on the tile that you want to make your cut
- Step 3 – Position Tile Scribe: Position the blade of the tile scribe at the start of your cutting line, ensuring it’s tight to the straight edge
- Step 4 – Score Tile: Gently push the tip of the scribe down into the tile glaze and at the same time, draw it along the line, keeping it tight to the straight edge. Ensure the glaze is scored through for the full length of the tile as if not it won’t break along the line
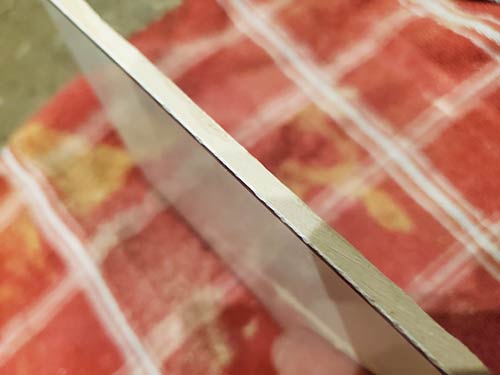
- Step 5 – Break Score Line: Place the tile over the edge of a work bench so the scored line is (facing upwards) directly above the edge of the surface or, as we’ve done here, place a pencil directly under the score line. Using the heel of you palm or a piece of wood or similar, gently tap down on the over hang until it breaks off
- Step 6 – Tidy Cut Edge: The final thing to do now is to use a tile file or carborundum stone to file off the cut edge so that it’s flat and smooth with no sharp edges
Mark cutting line on tile
Place straight edge on cutting line
Position tile scribe blade on cutting line
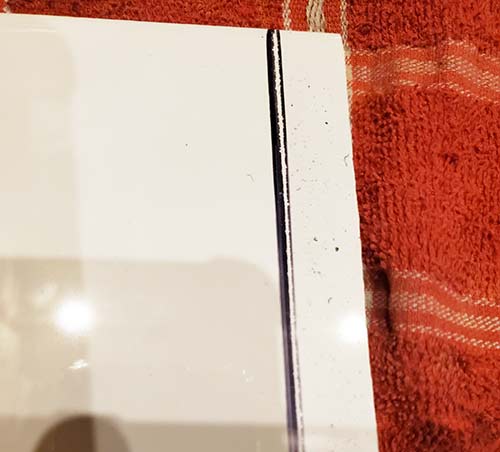
Tile scored along cutting line

Tile broken off along score line
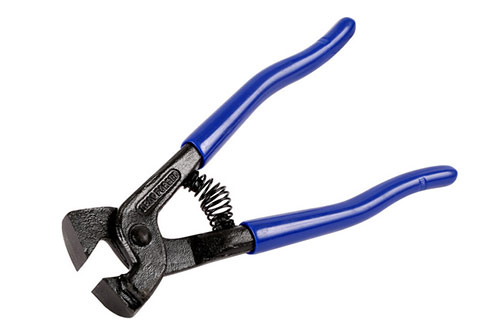
It’s also worth mentioning that you can purchase a tile scribe with it’s own in-built jaws that can then be used to break the cut line nice and clean.
On the top of the tool there is a cutting wheel that’s used to score the cut line and then the tile is placed in the cutting jaws and once the handles are squeezed, the tile breaks along the cut line.
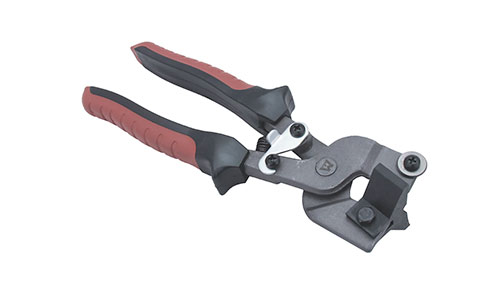
Tile cutters with integrated cutting wheel and snapping jaws
How to Cut Tiles Using a Manual Tile Cutter (Contractors Tile Cutter)
A slightly easier way is by using a mechanical tile cutter or contractors tile cutter as they are sometimes known.
You may find that with some of the cheaper ones that you need to go over the tile with the cutter 2 – 3 times to make sure that you have completely scored the glaze so the unwanted section will break off easily.
For only £15.00 its worth its weight in gold and will save you a lot of time if you have quite a few cuts to make.
If possible, get one with an adjustable guide as you can then ensure that your tile stays straight while cutting it. You will also then get a nice crisp line.
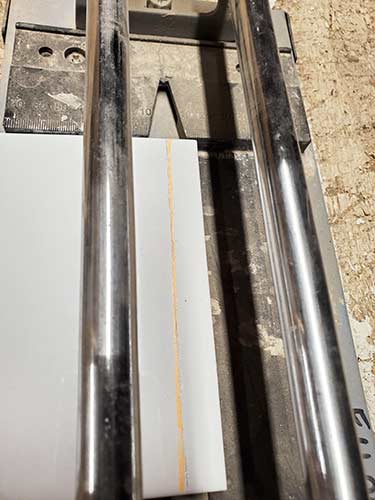
- Step 1 – Measure and Mark Cut: Measure and mark the cutting line precisely on your tile using a suitable pen. If your tile cutter features an adjustable guide fence, set the fence to the correct size for the cut
- Step 2 – Place Tile in Cutter: Take the tile and place it in the cutter ensuring the cut line, lines up perfectly with the cutting wheel. Perform a test run to make sure that your line is straight and also that the tile is sitting square
- Step 3 – Cut Tile: Draw the handle backwards so that the cutting wheel sits at the very start of your cutting line and then, applying a little downward pressure, push the cutting wheel over the cut line, scoring through the glaze. Repeat if needed to ensure the glaze is scored fully along the entire length of the tile
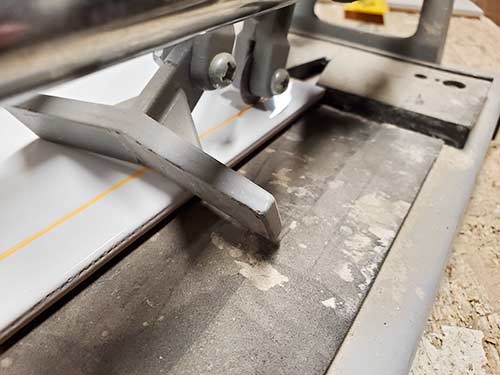
- Step 4 – Break Cut Line: Once the glaze is scored for the full length of the tile, position the snapping foot of the cutter around the centre of the tile and then gently apply downward pressure using the handle and the tile will break along the cut line
- Step 5 – Tidy Up: Using a tile file or carborundum stone, file off the cut edges of the tile and remove any and all sharp edges
Marking cut line on ceramic tile
Position tile in cutter so cutting wheel lines up with line
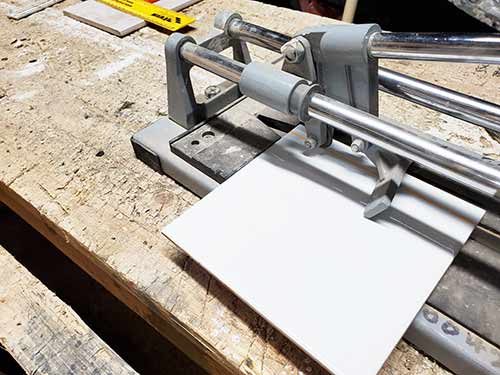
Tile cut line scored using manual tile cutter
The snapping foot of the tile cutter can be used to snap tile along cut line
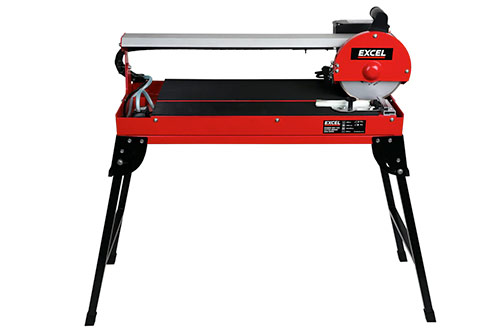
How to Cut Tiles Using an Electric Tile Cutter
Electric tile cutters are now widely available, easy to use and also relatively cheap, a fairly decent one can be purchased for around £50!
Like the manual cutter they feature a flat bed for the tile to sit on but instead of a cutting wheel there is a blade driven by an electric motor, this produces a much cleaner and straighter cut.
When looking for one to buy, try to get one with an adjustable fence guide that you can set to make a specific sized cut and by ensuring that your tile is level with the guide at all times will ensure that your cut is straight and true.
As you will be working close to the cutting wheel, make sure that you take great care and don’t get your fingers too close!
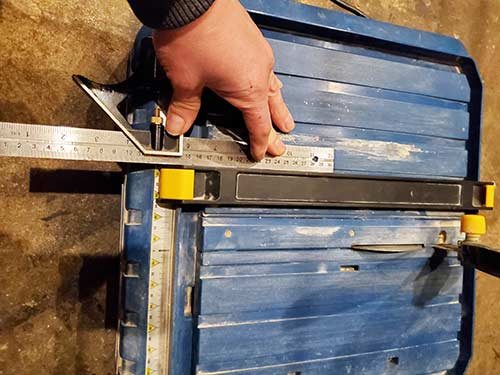
- Step 1 – Measure and Set Guide Fence: Loosen the locks on both ends of the guide fence and then draw out a length on your tape measure and move the fence until the correct measurement for the size of tile you need sits precisely to the left of the cutting blade and then lock the fence in place
- Step 2 – Check Fence is Square: Before any cutting takes place, use a carpenters square to ensure 100% that the fence is totally square as if not you’ll end up with an off-square tile
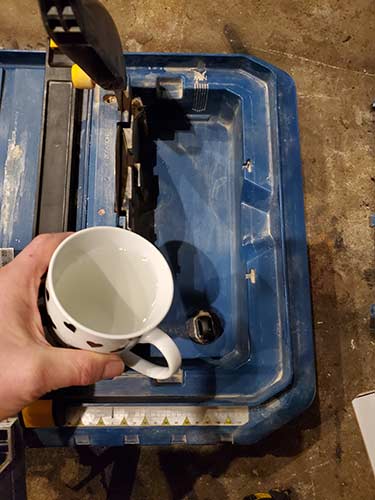
- Step 3 – Fill Water Reservoir: Lift up the reservoir flap and ensure the drain plug is pushed firmly in the drain hole and then pour in around a cup of water
- Step 4 – Cut Tile: Place the tile flat on the cutting bed and then start the saw up (ensure you’re wearing goggle, gloves and old clothes) and gently push the tile towards the cuting blade until it engages and then steadily push it on through until the cut is completed
Set the guide fence to the correct size of cut
Check guide fence is totally square
Fill tile saw water reservoir
Tile cut using electric tile cutter
Cutting Tiles Using a Tile Saw
The tile saw is mainly used for cutting shapes in tiles rather than straight lines as it’s extremely hard to cut a straight line with such as tool, the methods above often give much better results.
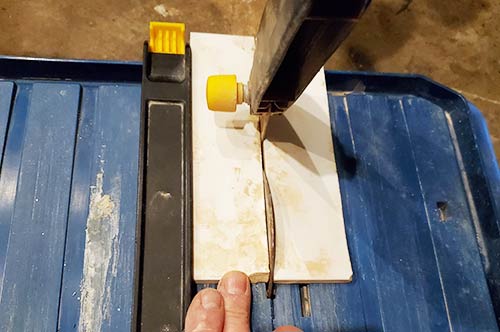
- Step 1 – Mark Cut Line: Mark the exact shape of your cutting line on the tiles surface
- Step 2 – Position Tile: Position the tile so that the uncut area is on a solid, flat surface and the edge to cut is overhanging so that you can easily saw away
- Step 3 – Cut Shape: Position the saw blade at the start of your cutting line and use slow, short cuts to form a starting cut in the tile. Once started, take your time and steadily cut along the line, ensuring the cut stays accurate at all times.
- Step 4 – Tidy Up Cut1: Once you have completed your cut, use a tile file or carborundum stone to smooth off the cut edge and remove any sharp, dangerous sections
150mm Tile Saw Blade
Cutting Porcelain Tiles
Porcelain tiles are a lot tougher and more dense than ceramic tiles and this means that they are also much more difficult to cut.
They are much denser due to the fact that they are fired at higher temperatures using a lot more pressure than standard ceramic tiles.
To cut porcelain tiles you need to use what’s known as a wet saw fitted with a diamond-tipped blade. What this does is to squirt water on the cutting blade as it cuts the tile. Coupled with the diamond-tipped blade capable of cutting through the hardest of materials, this produces a clean and accurate cut without causing any chips or damage.
This is also the case for larger, heavier floor tiles and also quarry tiles.
Wet tile cutter for cutting porcelain and quarry tiles
How to Tidy up Rough Edges of Tiles
Unless you have used an electric tile cutter, once you have cut your tile you will end up with quite a rough edge where the unwanted section has been broken away. Before the cut tile can be used anywhere the edge needs to be tidied up.
The best way to do this is to use a carborundum-tipped file or carborundum stone.
- Step 1 – Place Tile on Solid Surface: With the edge that you need to smooth facing upwards or overhanging the edge of a work surface, turn it so the edge is at 90° to your self
- Step 2 – Position File: Take your file and position it so the flat edge is flat to the surface that needs smoothing
- Step 3 – File Edge Flat: With the file held flat on the surface of the tile, gently pull and push it over the edge, moving from front to back until it’s totally flat and smooth
Position file flat on edge to be smoothed
Cut edge of tile smoothed and flattened off
How to Cut Shapes in Tiles
Before any cutting can take place the shape that needs to be created first needs to be transferred on to the tile.
There are a huge range of different tools that can be used to do this but the easiest and most effective to use are the good old template or the profile gauge.
The template is exactly as you may imagine it, it’s basically a cardboard cut out of the shape you want to create that is then marked on on the tile so that you can then cut around it.
The profile gauge works in a similar way. It has hundreds of thin "needles" which, when pressed against the profile or shape you are copying, will form the outline which can be transferred by drawing round it.
There is one drawback with this tool however and this comes in the form of actually getting the copied profile of your shape on to the tile in the right place. This tool is great at marking out the correct shape but it is then left up to you to measure and mark the tile with the shape in exactly the right place.
To get it in the right place often involves measuring and marking an exact starting point and depending on the actual shape, this can be quite tricky to get exactly right.
Profile Gauge
Once Your shape has been drawn it then needs to be cut out and the best tools to use for cutting shapes in ceramic tiles are tile nips or a tile saw.
Tile saws are very straight forward to use, simply place the tile with the area to be cut overhanging the edge of a works surface, start the cut slowly and then simply take your time to cut around the markings.
For all the tiny cuts needed in the corners of tiles to fit into awkward places and around items protruding from the wall such as pipes or sinks, a pair of tile "nips" are needed.
The key to using these things is to not try and cut too much at once and all of the blade should never be on the tile at once.
Tile pieces half a blade length should be attempted and no more than a quarter of an inch deep. It is possible to cut very clean complex shapes, but patience and care are the key! It is possible to cut a full circle with these nips.
1116 TCT tile nippers for walls or floor tiles
Cutting and Drilling Holes in Ceramic Tiles
Making holes in tiles can be down in two ways. You can either drill, using a small masonry or tile drill, for large holes use a set of tile hole cutters or you can drill a series of small holes all the way round the diameter of the hole you need to cut and then insert your tile saw and cut along the edges to join up the holes.
Using this method you will need, for neatness sake, a tile file to smooth off all the drilled edges.
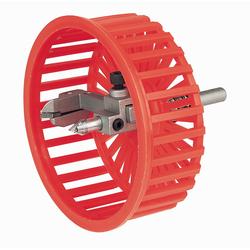
Circle tile cutter and guard
For the small cost of £13.00, the above tool is a bargain! A Neat hole of any size can be created, every time and no frustrations with tiles breaking at the last moment. This particular one is adjustable from 20mm to 94mm and is ideal for bathrooms.
The red fence around it is a guard that ensures that nothing gets caught on the cutter as it is spinning on the drill.
As with every project, as well as having the right tools for the job, it is a really good idea to practice first. Buy an extra box of tiles to practice the cuts, it will pay for itself in the long run. A job done on the cheap is one that will probably have to be done twice!!
When it comes to drilling ceramic tiles, first make a mark in the centre of the hole that needs drilling using a hand held tile scribe. Put it in the place where you need the hole and twist it so it scores the glaze. You can then use a power drill (with the hammer action turned off) to drill your hole.
The drill bit should be the smallest you have to start with. You can then work upwards in drill size until you have the desired size hole.
Most fixings you will use in the bathroom require a red wall plug and a 6 or 7mm hole, you should start with a 3mm hole first, right into the score mark you have made, then go up to a 5mm drill bit, then 7. This makes the operation far less likely to break tiles. Do not put force on the drill, just gentle pressure.
Cutting ceramic tiles and indeed drilling holes in ceramic tiles can be tricky if you’ve never done it before due to the fact that they brittle and can break easily, how ever if you take your time and use the right tools then there’s no reason why you can’t get cuts and good as the pros!